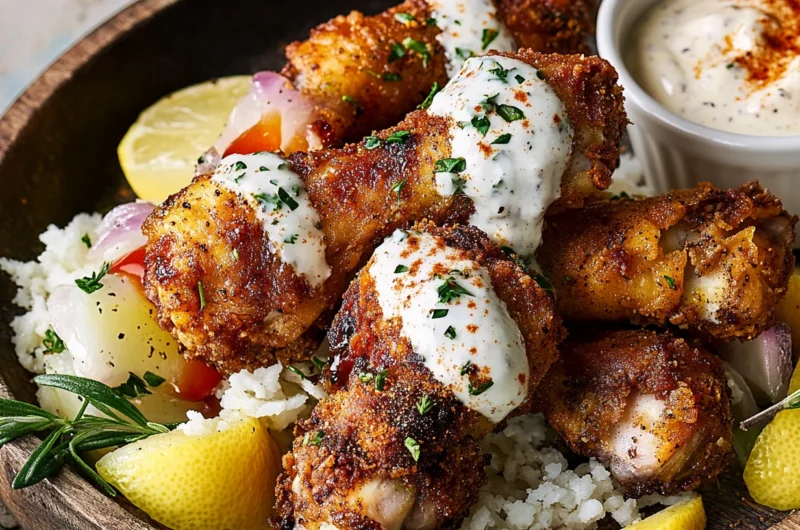
Crispy Fried Chicken Drumsticks: 7 Secrets for Perfect Crunch
Crispy Fried Chicken Drumsticks: 7 Secrets for Perfect Crunch
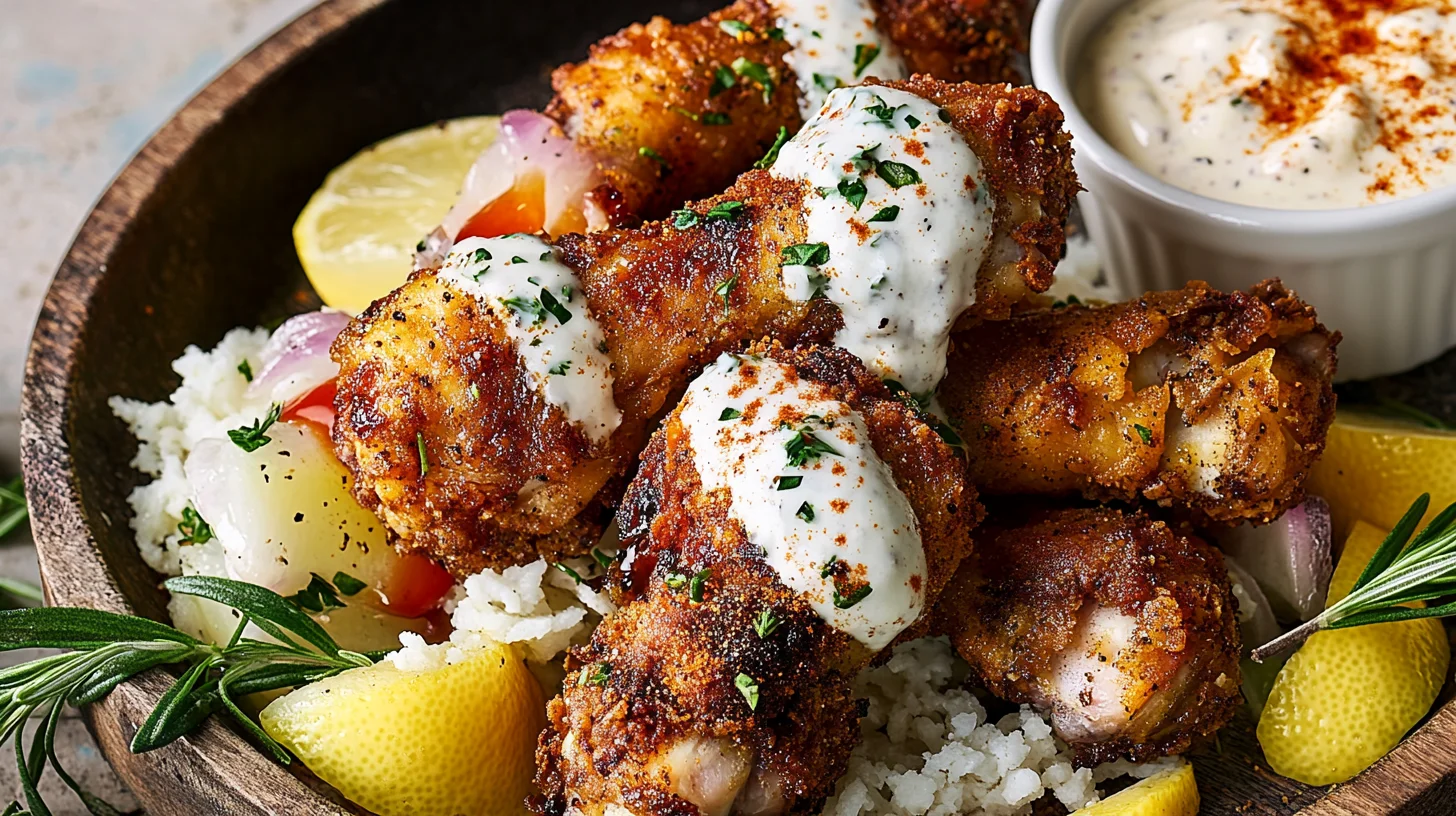
Crispy Fried Chicken Drumsticks

Struggling with soggy chicken? Discover the 7 professional techniques that guarantee Crispy Fried Chicken Drumsticks with the perfect golden crunch every time. Learn these secrets today.
Type: Main Course
Cuisine: American, Southern
Keywords: Comfort food, weekend cooking, family dinner, summer picnic, game day food, crispy chicken
Recipe Yield: 6 servings
Calories: 385
Preparation Time: P2H30M
Cooking Time: PT25M
Total Time: P2H55M
Recipe Ingredients:
- 10-12 chicken drumsticks (approximately 3 pounds
- 2 cups buttermilk
- 2 tablespoons hot sauce (optional)
- 3 cups all-purpose flour
- 1 cup cornstarch
- 2 tablespoons baking powder
- 1 tablespoon garlic powder
- 1 tablespoon onion powder
- 2 teaspoons paprika
- 2 teaspoons dried thyme
- 2 teaspoons dried oregano
- 2 teaspoons salt, plus additional for seasoning
Recipe Instructions: In a large bowl, combine buttermilk and hot sauce to create the marinade. Add chicken drumsticks to the marinade, ensuring each piece is submerged. Cover and refrigerate for at least 2 hours, preferably overnight. Remove chicken from refrigerator and let stand at room temperature for 30 minutes prior to cooking. In a large shallow dish, whisk together flour, cornstarch, baking powder, and all seasonings. Drizzle 3 tablespoons of the buttermilk marinade into the flour mixture and work it in with fingertips to create small clumps. Heat vegetable oil in a large, heavy-bottomed pot to 325°F (163°C). Remove each drumstick from marinade, allowing excess to drip off, then dredge in flour mixture, pressing to ensure coating adheres. For extra crispiness, dip coated chicken briefly back in marinade, then dredge in flour mixture a second time. Fry chicken in batches of 4-5 pieces for 12-14 minutes, maintaining oil temperature between 315-325°F, until golden brown and internal temperature reaches 165°F. Transfer fried chicken to a wire rack over a baking sheet and immediately season with a light sprinkle of salt. Keep finished chicken warm in a 200°F oven while completing remaining batches. Allow chicken to rest 5-10 minutes before serving.
4.8
Crispy Fried Chicken Drumsticks: 7 Secrets for Perfect Crunch
Table of Contents
There’s something undeniably satisfying about biting into perfectly crispy fried chicken drumsticks—that distinctive crunch giving way to juicy, tender meat that practically falls off the bone. This iconic comfort food transcends cultural boundaries, appearing on dinner tables across the globe in countless variations, yet the pursuit of truly exceptional crispiness remains a culinary holy grail for home cooks and professional chefs alike.
What separates mediocre fried chicken from memorable fried chicken lies in understanding the science behind achieving that perfect golden-brown exterior. Did you know that the temperature of your chicken before frying can make a significant difference in your results? Many home cooks overlook this crucial detail, rushing their chicken straight from refrigerator to fryer—a common mistake that leads to uneven cooking and compromised crispiness.
While fried chicken has humble origins as a resourceful way to transform less expensive cuts into delectable meals, modern techniques have elevated this dish to an art form. Unlike our Herb-Roasted Chicken recipe that relies on dry heat for flavor development, fried chicken depends on precise temperature control and coating techniques to create that signature crispy shell that protects and enhances the chicken’s natural moisture.
What makes this particular recipe special is not just the outcome—perfectly crispy drumsticks with juicy interiors—but the methodical approach that ensures success every time. These seven secrets represent years of kitchen experimentation and professional wisdom, distilled into straightforward techniques anyone can master. The beauty lies in the recipe’s forgiving nature; even novice cooks can achieve restaurant-quality results by following these fundamental principles.
Join me on this culinary journey as we unlock the secrets to creating Crispy Fried Chicken Drumsticks that will have your family and friends convinced you’ve been hiding professional culinary training. Whether you’re preparing a weeknight dinner or weekend gathering, these techniques will transform an ordinary meal into an extraordinary experience worth sharing.
What is Crispy Fried Chicken Drumsticks?
Have you ever wondered why such a straightforward dish deserves its own lengthy name? Crispy Fried Chicken Drumsticks isn’t just a description—it’s a promise of the perfect texture contrast waiting to grace your plate! These aren’t just any chicken legs tossed into hot oil; they’re carefully prepared drumsticks transformed through culinary alchemy into the ultimate comfort food experience. As my grandmother used to say with a wink, “The way to a man’s heart is through his stomach, but the way to everyone’s heart is through perfectly crispy chicken!” The name itself tells you exactly what you’re getting—chicken portions that deliver that satisfying crunch from first bite to last, with the convenient built-in handle that makes drumsticks nature’s perfect finger food. What’s not to love about that? I encourage you to discover why this humble dish has maintained its beloved status across generations and cuisines worldwide!
Why You’ll Love This Crispy Fried Chicken Drumsticks:
This Crispy Fried Chicken Drumsticks recipe delivers the perfect trifecta of culinary satisfaction that will transform your dinner table. First and foremost, the unmistakable crunch factor sets this recipe apart—a satisfyingly crisp exterior that shatters gloriously with each bite while protecting the succulent meat within. The contrast between these textures creates that memorable eating experience that distinguishes truly exceptional fried chicken from ordinary versions.
From an economic perspective, preparing Crispy Fried Chicken Drumsticks at home represents significant cost savings compared to restaurant or takeout alternatives. Drumsticks consistently rank among the most affordable chicken cuts, yet when prepared properly, they deliver premium results. A family-sized batch costs a fraction of commercial options while yielding superior quality and allowing complete control over ingredients and preparation methods.
The flavor profile of these drumsticks elevates them beyond basic fried chicken, thanks to a carefully calibrated blend of seasonings that infuse every layer. Unlike our Spicy Buffalo Wings recipe that relies primarily on sauce for flavor, these drumsticks incorporate seasonings directly into the marinade and coating, ensuring consistent flavor from the first bite to the last. The combination of buttermilk tenderization, aromatic herbs, and savory spices creates a depth of flavor that commercial versions rarely achieve.
Ready to transform ordinary chicken into an extraordinary meal experience? Try this recipe today and discover why these Crispy Fried Chicken Drumsticks have become a reader favorite!
How to Make Crispy Fried Chicken Drumsticks:
Quick Overview
This Crispy Fried Chicken Drumsticks recipe delivers restaurant-quality results through a straightforward process that balances simplicity with technical precision. The magic happens through a two-stage coating process that creates the perfect crispy exterior while a buttermilk marinade ensures exceptionally tender, flavorful meat inside. What sets this recipe apart is the methodical approach to temperature control—both of the chicken and the cooking oil—which guarantees consistent results even for novice cooks. From start to finish, you’ll need approximately 3 hours (including 2 hours of marination time) to prepare this crowd-pleasing dish that promises to become a regular in your recipe rotation.
What to Serve Crispy Fried Chicken Drumsticks With:
Elevate your Crispy Fried Chicken Drumsticks meal by pairing these crunchy delights with complementary side dishes that balance the richness and create a well-rounded dining experience. For a classic southern-inspired meal, serve alongside creamy buttermilk mashed potatoes and collard greens braised with a hint of vinegar—the velvety potatoes and slightly acidic greens provide perfect counterpoints to the chicken’s richness and crunch.
For a more contemporary approach, consider a crisp coleslaw dressed with a light vinaigrette rather than mayonnaise. The bright, tangy flavors and crunchy texture create a refreshing palate cleanser between bites of chicken. Buttery corn on the cob or honey-glazed cornbread muffins also make excellent accompaniments, echoing the southern roots of fried chicken while adding sweet notes to the savory meal.
Beverage pairings further enhance the experience craft beer enthusiasts might appreciate a crisp pilsner or wheat beer, while wine drinkers should consider a slightly sweet Riesling or sparkling rosé that can cut through the richness. For non-alcoholic options, classic sweet tea with lemon or a tart lemonade provides the perfect refreshing counterpoint to complete this satisfying meal.
More Lunch Recipes You’ll Love
Looking to expand your lunchtime repertoire beyond our Crispy Fried Chicken Drumsticks? Our collection of satisfying midday meals offers something for every palate and occasion. The hearty Chicken Enchilada Soup transforms the beloved Mexican dish into a convenient, spoonable format with tender chicken, melted cheese, and authentic enchilada flavors in every warming spoonful. Pair these recipes with fresh salads or crusty bread for complete meals that will energize your afternoon without weighing you down. Each recipe maintains our commitment to approachable techniques, clear instructions, and restaurant-quality results that can be achieved in your home kitchen, making lunchtime something to anticipate rather than merely an obligatory break in your day.
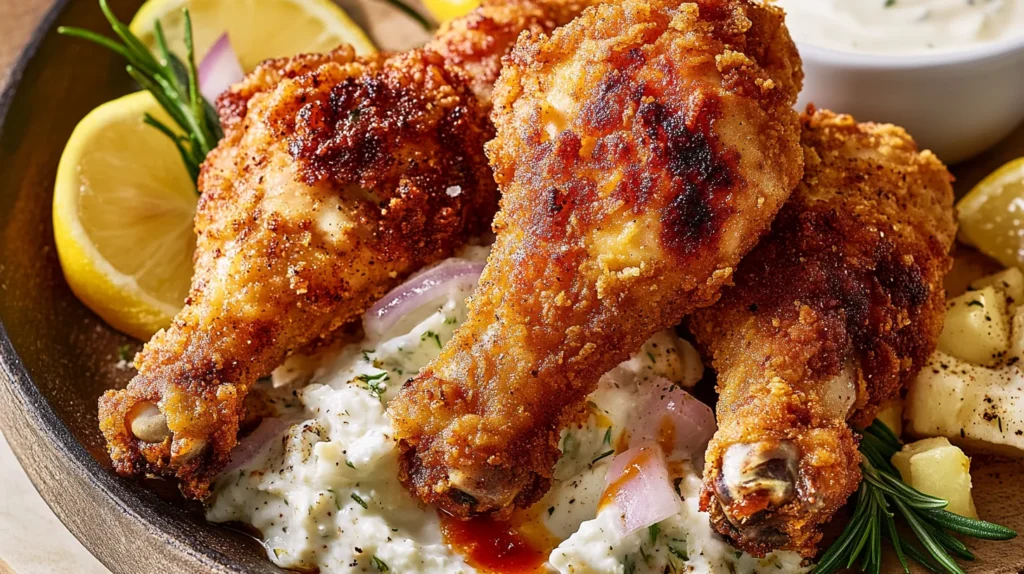
Top Tips for Perfecting Crispy Fried Chicken Drumsticks:
Secret #1: Temperature Control is Non-Negotiable
The difference between mediocre and magnificent fried chicken often comes down to precise temperature management. Allow your marinated chicken to sit at room temperature for 30 minutes before coating and frying. Cold chicken straight from the refrigerator causes oil temperature to drop dramatically, resulting in greasy, soggy coating. Similarly, maintain oil temperature between 315-325°F (157-163°C)—higher temperatures burn the exterior before the interior cooks, while lower temperatures allow the coating to absorb excess oil. Invest in a reliable deep-fry thermometer and adjust your heat source throughout the cooking process.
Secret #2: The Double-Dredge Technique
For exceptionally crispy chicken, employ the double-dredge method. After the initial flour coating, briefly dip the chicken back into the marinade and then into the flour mixture again. This creates multiple layers that develop into an extraordinarily crunchy exterior during frying. When executing this technique, use one hand for wet ingredients and the other for dry to prevent the dreaded “dough hands” that can compromise your coating.
Secret #3: Cornstarch is Your Crispy Ally
The addition of cornstarch to the flour mixture is non-negotiable for superior crispiness. While all-purpose flour provides structure, cornstarch creates a lighter, crispier texture that maintains its crunch longer. The ideal ratio is approximately 3:1 flour to cornstarch. For those with cornstarch allergies, potato starch provides similar results, though the flavor profile will be slightly different.
Secret #4: Buttermilk Marinade Magic
The acidic properties of buttermilk do more than flavor the chicken—they begin breaking down proteins, resulting in remarkably tender meat. If buttermilk is unavailable, create a substitute by adding 1 tablespoon of lemon juice or vinegar to 1 cup of regular milk and allowing it to sit for 10 minutes before using. For dairy-free options, coconut milk with a tablespoon of lemon juice provides similar tenderizing benefits with a subtle flavor difference.
Secret #5: The Baking Powder Trick
Adding baking powder to your dredging mixture might seem unusual, but this secret ingredient creates micro-bubbles during the frying process, resulting in an ethereally light, crispy coating. Approximately 2 teaspoons per 3 cups of flour is sufficient; more can impart a metallic taste. Ensure you’re using baking powder, not baking soda, as the latter will create an unpleasant chemical flavor without the desired textural benefits.
Secret #6: Textured Coating Development
Creating a textured coating significantly enhances crispiness. After mixing your dry ingredients, drizzle 3-4 tablespoons of the buttermilk marinade into the flour mixture and work it in with your fingertips to create small clumps. These textured bits adhere to the chicken during coating, creating additional surface area that becomes extra-crunchy during frying. This technique alone can transform ordinary fried chicken into a standout dish.
Secret #7: Proper Resting Technique
Perhaps the most overlooked aspect of perfect fried chicken is how you rest it after frying. Never place freshly fried chicken directly on paper towels, as this traps steam and quickly softens the crispy coating. Instead, rest finished chicken on a wire rack positioned over a baking sheet, which allows air circulation on all sides. For large batches, hold finished pieces in a 200°F (93°C) oven on this same wire rack setup to maintain crispiness without continuing to cook the chicken.
Crispy Fried Chicken Drumsticks
Course: Main DishCuisine: American SouthernDifficulty: Intermediate6
servings2
hours30
minutes25
minutes385
kcalIngredients
10-12 chicken drumsticks (approximately 3 pounds)
2 cups buttermilk
2 tablespoons hot sauce (optional, for flavor not heat)
3 cups all-purpose flour
1 cup cornstarch
2 tablespoons baking powder
1 tablespoon garlic powder
1 tablespoon onion powder
2 teaspoons paprika
2 teaspoons dried thyme
2 teaspoons ground black pepper
2 teaspoons salt, plus additional for seasoning after cooking
Vegetable oil for frying (approximately 2-3 quarts)
Step-by-Step Instructions:
- Prepare the Marinade: In a large bowl, combine the buttermilk and hot sauce. Whisk thoroughly until fully incorporated. The buttermilk’s acidity begins the tenderizing process while the hot sauce adds depth of flavor without noticeable heat.
- Marinate the Chicken: Place the chicken drumsticks in the buttermilk mixture, ensuring each piece is completely submerged. Cover the bowl with plastic wrap and refrigerate for at least 2 hours, ideally overnight. This crucial step not only enhances flavor penetration but also begins breaking down proteins for a more tender result.
- Prepare the Dredging Station: When ready to cook, remove the marinated chicken from the refrigerator and allow it to sit at room temperature for 30 minutes. This tempering process ensures more even cooking. Meanwhile, in a large shallow dish or baking pan, combine the flour, cornstarch, baking powder, garlic powder, onion powder, paprika, thyme, oregano, black pepper, and salt. Whisk thoroughly to ensure even distribution of seasonings.
- Create the Dredging Mixture: Take 3 tablespoons of the buttermilk marinade and drizzle it into the flour mixture. Using your fingertips, gently work the liquid into the flour, creating small clumps. These textured bits will adhere to the chicken during frying, creating extra crunchy elements in the coating.
- Heat the Oil: In a large, heavy-bottomed pot or deep fryer, heat the vegetable oil to 325°F (163°C). Use a cooking thermometer to monitor the temperature accurately, as proper oil temperature is critical for achieving optimal crispiness without greasiness. The oil should be approximately 3 inches deep to allow proper submersion of the drumsticks.
- Coat the Chicken: Remove each drumstick from the marinade, allowing excess liquid to drip off. Dredge each piece in the flour mixture, pressing firmly to ensure the coating adheres to all surfaces. For extra crispiness, dip the coated drumstick briefly back into the remaining marinade and then dredge in the flour mixture a second time. Place the coated drumsticks on a wire rack set over a baking sheet.
- Fry the Chicken: Working in batches of 4-5 drumsticks at a time (to avoid overcrowding and temperature drops), carefully lower the coated chicken into the hot oil. Maintain the oil temperature between 315-325°F (157-163°C) throughout the cooking process, adjusting heat as necessary. Fry for 12-14 minutes, turning occasionally, until the coating is golden brown and the internal temperature reaches 165°F (74°C) when tested with a meat thermometer.
- Drain and Season: Using tongs, carefully remove the fried drumsticks and place them on a clean wire rack positioned over a baking sheet (not paper towels, which can create steam and soften the crispy coating). Immediately season with a light sprinkle of salt while still hot.
- Maintain Crispiness: To keep the chicken crispy while completing additional batches, place the finished drumsticks in a 200°F (93°C) oven on the wire rack and baking sheet. This maintains crispiness without continuing to cook the chicken.
- Rest Before Serving: Allow the chicken to rest for 5-10 minutes before serving. This brief resting period helps the juices redistribute throughout the meat while allowing the coating to set for maximum crispiness.
Nutrition Facts
- Calories: 385 kcal | Total Fat: 21g | Saturated Fat: 5.5g | Trans Fat: 0.2g | Cholesterol: 142mg | Sodium: 685mg | Carbohydrates: 17g | Dietary Fiber: 0.8g | Sugars: 0.6g | Protein: 31g | Vitamin D: 0.4μg | Calcium: 52mg | Iron: 2.8mg | Potassium: 325mg
Storing and Reheating Tips:
Properly storing and reheating your Crispy Fried Chicken Drumsticks ensures you can enjoy that satisfying crunch even days after initial preparation. For refrigeration, allow the fried chicken to cool completely to room temperature—approximately 30 minutes—before storing. Place the drumsticks in an airtight container, separating layers with parchment paper to prevent moisture transfer and coating damage. Properly stored, the chicken remains safe to consume for 3-4 days in the refrigerator at or below 40°F (4°C).
For longer preservation, freezing is an excellent option. Wrap each fully cooled drumstick individually in plastic wrap, then place in a freezer-safe ziplock bag with the air pressed out. Label with the date and consume within 3 months for optimal quality, though the chicken remains safe indefinitely when properly frozen below 0°F (-18°C).
The reheating process is crucial for maintaining that coveted crispy texture. For refrigerated chicken, the best method is oven reheating: Place drumsticks on a wire rack over a baking sheet and warm in a preheated 375°F (190°C) oven for 10-15 minutes until the internal temperature reaches 165°F (74°C). This method recrisps the exterior while gently warming the interior without drying the meat.
For frozen drumsticks, thaw overnight in the refrigerator before using the same oven reheating method, extending the time to 15-20 minutes. Avoid microwave reheating, which inevitably produces soggy, rubbery results. If time constraints necessitate microwave use, consider finishing with a brief broil (2-3 minutes, watching carefully) to restore some crispiness to the exterior.
Frequently Asked Questions – Crispy Fried Chicken Drumsticks
Can I use chicken thighs or wings instead of drumsticks?
Yes, this recipe works excellently with other chicken pieces. Chicken thighs require approximately the same cooking time as drumsticks (12-14 minutes). Wings will cook faster (8-10 minutes) due to their smaller size. Always verify doneness with a meat thermometer to ensure the internal temperature reaches 165°F (74°C).
What can I substitute for buttermilk?
If buttermilk is unavailable, make a quick substitute by adding 1 tablespoon of lemon juice or white vinegar to 1 cup of regular milk. Let it stand for 10 minutes before using. For dairy-free alternatives, coconut milk with a tablespoon of lemon juice provides similar tenderizing benefits.
How can I make this recipe gluten-free?
Replace the all-purpose flour with a gluten-free flour blend. Rice flour combined with cornstarch (in a 3:1 ratio) also creates excellent results with an exceptionally crispy texture. Ensure your baking powder is certified gluten-free, as some brands contain wheat derivatives.

